
🧰 What You Will Need:
- Your screenshots from Part 1 Step 4 and your listing details from Part 1 Step 5
- Your app icon (a square 1024 x 1024 PNG is recommended)
- A 1024 x 500 PNG feature graphic for Google Play (required)
- Your Hub's privacy policy URL and a public support URL
- A dedicated test member in your Hub, to use as the demo login for Apple and Google reviewers
Guide Purpose
Part 3 gets your store listings ready. You'll work through every section of App Store Connect and Google Play Console, so nothing is missing when you build and submit your app in Part 4.
Table of Contents
➡️ Feel free to click on any link to dive deeper into what's being mentioned.
Step 1 - Prepare your iOS app in App Store Connect
Work through every App Store Connect section so your listing is complete.
App Store Connect splits your app's listing across several screens. Apple isn't as helpful as Google at showing you what's missing: there's no master checklist in its interface, and it's easy to skip a section without realizing it until your build gets stuck in Part 4.
Use this step as your checklist, and work from top to bottom. Have your screenshots from Part 1 Step 4 and your listing details from Part 1 Step 5 ready.
Check that your agreements are complete
- Go to https://appstoreconnect.apple.com/.
- Click Business (https://appstoreconnect.apple.com/business).
- Make sure you've completed all the Agreements.
- Also make sure you've accepted the agreements in your developer account at https://developer.apple.com/account.
Open your app in App Store Connect
Go to appstoreconnect.apple.com, click Apps, then select your app.
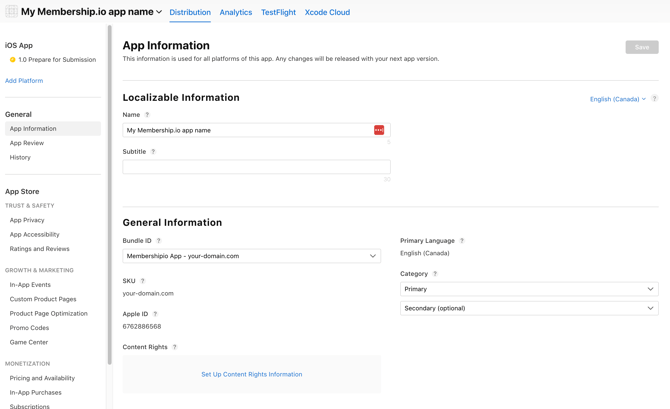
App Information (left sidebar)
- Subtitle (30 characters): A short tagline shown under your app name.
- Privacy Policy URL: Required. Use your Hub's privacy policy. Here is a video showing how to find your privacy policy link in your Membership.io account.
- Category: A primary category is required and a secondary one is optional. Use what you drafted in Part 1 Step 5.
- Content Rights: Declare whether your app contains third-party content.
- Age Rating: Click Edit and work through the questionnaire. Most Membership.io apps are rated 4+.
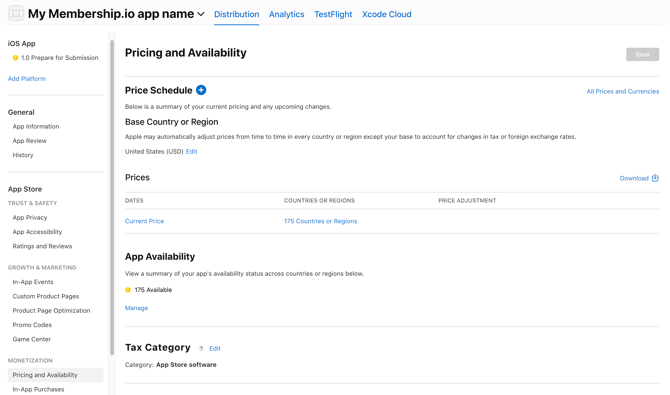
Pricing and Availability
- Price: Set to Free ($0.00).
- Availability: Leave as "Available in all countries or regions" unless you have a reason to restrict it.
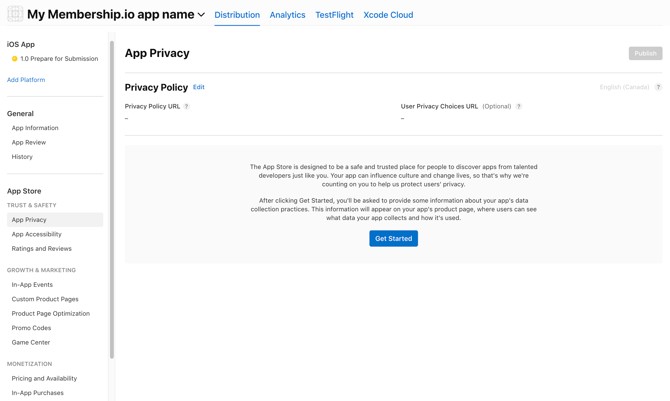
App Privacy
This is where Apple asks what data your app collects.
- Click Get Started.
- Work through every prompt. For most Membership.io apps, you'll declare the data types listed below.
- Click Publish for the App Privacy section.
- Contact info (email, name): Used for app functionality, linked to the user.
- Identifiers (user ID): Used for app functionality, linked to the user.
- Usage data: Used for analytics.
NOTE: Don't rush this. If your declarations don't match what your app actually does, Apple will reject the submission.
Version 1.0: Prepare for Submission
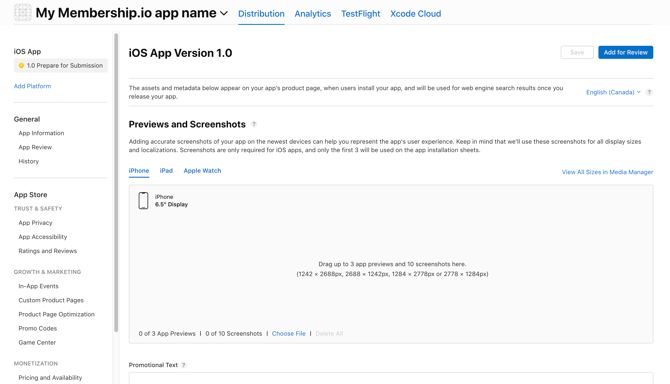
Click 1.0 Prepare for Submission in the sidebar. This is where most of your listing lives.
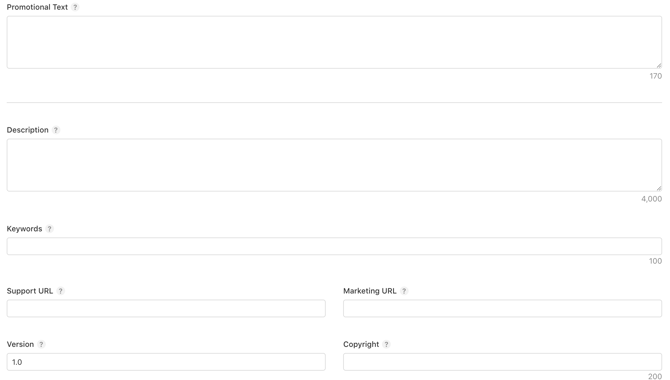
- Promotional Text (optional, 170 characters): You can update this any time without a new submission.
- Description (4,000 characters): Your full pitch. Use the long description from Part 1 Step 5.
- Keywords (100 characters, comma-separated, no spaces): Paste in the keywords from Part 1 Step 5.
- Support URL: Required. It must link to a public support page where your users can find a way to contact you.
- Marketing URL (optional): Your main website.
Screenshots
NOTE: You created these in Part 1 Step 4 using the Mobile First Chrome extension and Canva templates. If you skipped that step or need a refresher on dimensions and how to capture them, go back to Part 1 Step 4 before continuing.
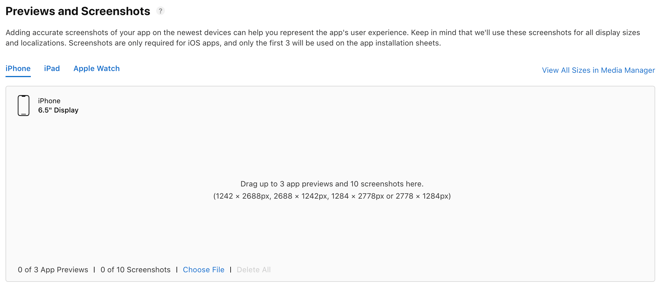
Upload your screenshots:
- iPhone 6.7" Display: Your iPhone 14 Plus screenshots (1242 x 2688 px)
- iPad 13" Display: Your iPad Air 4 screenshots (2064 x 2752 px)
Order matters. The first screenshot is what people see first in search, so lead with your strongest.
Build
Leave this section empty for now. You'll attach your build in Part 4 Step 3, after you build it in Part 4 Step 1.
App Review Information
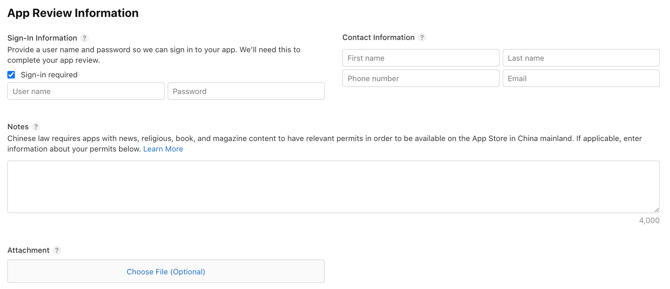
This is what the Apple reviewer sees when they review your app.
- Sign-in required: Yes. Provide a demo account email and password the reviewer can use to log in. Create a dedicated test member in your Hub for this, and don't use your own admin account.
- Contact information: A name, email and phone number the reviewer can use to reach you.
- Notes (optional): If anything about your app needs context for the reviewer, write it here. The Guideline 2.1 reply template in Common App Store Rejections is a good starting point.
Version Release
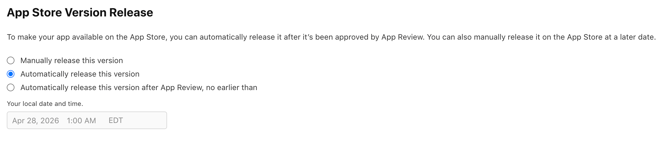
Choose Automatically release this version. This makes sure the app actually goes live after Apple approves it.
Before you leave this page
- Save as you go. App Store Connect doesn't auto-save.
- Do not click Add for Review yet.
Part 3 Step 2 - Prepare your app in Google Play Console
Complete the Set up your app checklist until every item shows a green checkmark.
Google Play Console makes this step easier. It lays out a checklist under Set up your app, and every section you complete turns green. Your goal is all green checkmarks, working from top to bottom.
Open the checklist
- Log in to Play Console at play.google.com/console.
- Select your app.
- Expand the Set up your app section.
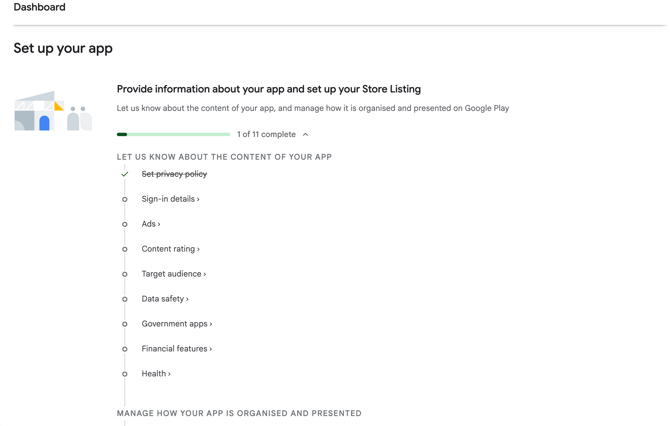
You'll see two groups under Set up your app. Complete every item in both.
Group 1 - Let us know about the content of your app
- Set privacy policy: Paste in your Hub's privacy policy URL.
- Sign-in details: Add sign-in details to help Google Play access the restricted parts of your app.
- Username and password: We recommend creating a new test account in your Membership.io Hub, so you're not sharing your personal details. Make sure this test account meets the requirements to view all the content in your account.
- Restricted access: When asked whether any part of your app is restricted, select Yes.
- App access: Declare that parts of your app require login. Provide demo credentials, using the same dedicated test member you created for Apple in Part 3 Step 1.
- Ads: Most Membership.io apps don't have ads. Declare accordingly.
- Content rating: Fill out the questionnaire honestly. For most memberships, the result will be Everyone or Teen.
- Target audience: Typically 18+ for membership apps.
- Data safety: Google's version of Apple's App Privacy. Declare what data your app collects.
- For the question "Which of the following methods of account creation does your app support?", choose "My app does not allow users to create an account".
- For the question "How are these accounts created?", choose "Out of app identification".
- Government apps: No.
- Financial features: No. Your app doesn't process payments, your Hub does.
- Health: Only if applicable.
IMPORTANT: Don't skip any section under "Let us know about the content of your app." Google will block your submission until every item shows a green checkmark, including sections that don't apply to you. You still have to declare No.
Group 2 - Manage how your app is organized and presented
- Select an app category and provide contact details: Pick the category that best matches your content, and add the support email from Part 1 Step 5.
- Set up your store listing: This is your public listing.
-
App name: Already filled in from Part 2.
-
Short description (80 characters): Your one-sentence hook from Part 1 Step 5.
-
Full description (4,000 characters): Your long description from Part 1 Step 5.
-
App icon (512 x 512 PNG): Use the icon Membership.io auto-generates from your Hub favicon, or upload a custom one.
-
Feature graphic (1024 x 500 PNG): Required. This is the banner image at the top of your listing. Create one in Canva using your brand colours and logo.
-
Phone screenshots: Your Google Pixel 6 PRO screenshots (1080 x 1920 px).
-
Tablet screenshots (optional but recommended): Your iPad Air 4 screenshots will work here.
NOTE: You created your phone and tablet screenshots in Part 1 Step 4 using the Mobile First Chrome extension and Canva templates. If you skipped that step or need a refresher, go back to Part 1 Step 4 before continuing.
Congratulations! 👏 You've finished Part 3. Your App Store Connect and Google Play Console listings are ready for your first build.
Take It Further …
- Mobile App Part 4: Build and Publish Your App
Build your app, test it on a real device, and submit it to Apple and Google for review.
➡️ Continue to Part 4