🧰 What You Will Need:
- A Membership.io subscription
- Two or more Hubs
- Content, programs, or resources you want to organize in a central location
Referred to as a “Router Hub,” this central Hub serves as a directory that guides members through your Membership.io program or broader membership ecosystem.
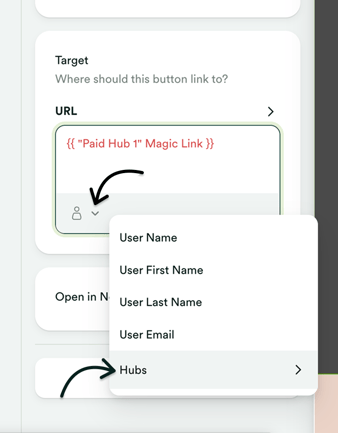
You can combine Hub links, apply controlled visibility (for example, using segments), and then use the Hub Magic Link* to let members move between Hubs without re-entering their login details, all while presenting a personalized dashboard that highlights the content each member can access.
*The Hub Magic Link personalization feature is not enabled by default. Please reach out to us at help@membership.ioto make it available to you. See Step 3 on how to set this up when linking a section to another Hub.
💡 A Router Hub and Hub Switcher can be used together.
While a Router Hub serves as a centralized dashboard for resources, programs, and Hub access, Hub Switcher provides a navigation menu that allows members to move between connected Hubs from anywhere in your network.
Many creators use both features to streamline the member experience. See: Link your Hubs together with the Hub Switcher
Step 1 – Create a Hub to serve as your central dashboard
Create a new Hub or choose an existing Hub that will act as the central destination for your members, a.k.a., your "home base."
This Hub can include free resources, program directories, community links, announcements, exclusive content, and upsell opportunities.
Step 2 – Add sections for your programs and resources
Build sections that organize your content and Hub links. Here are some examples:
- Free resources
- Course library
- Coaching programs
- Community access
- Upcoming events
Each section can contain text, images, buttons, and other Hub content to help members find what they're looking for.
💡 TIP: Consider placing free sources near the top of the page and member-only content further down the Hub.
Step 3 – Create elements that link to other Hubs
Add and configure elements, such as buttons,that will help direct members to the Hubs you want them to access.
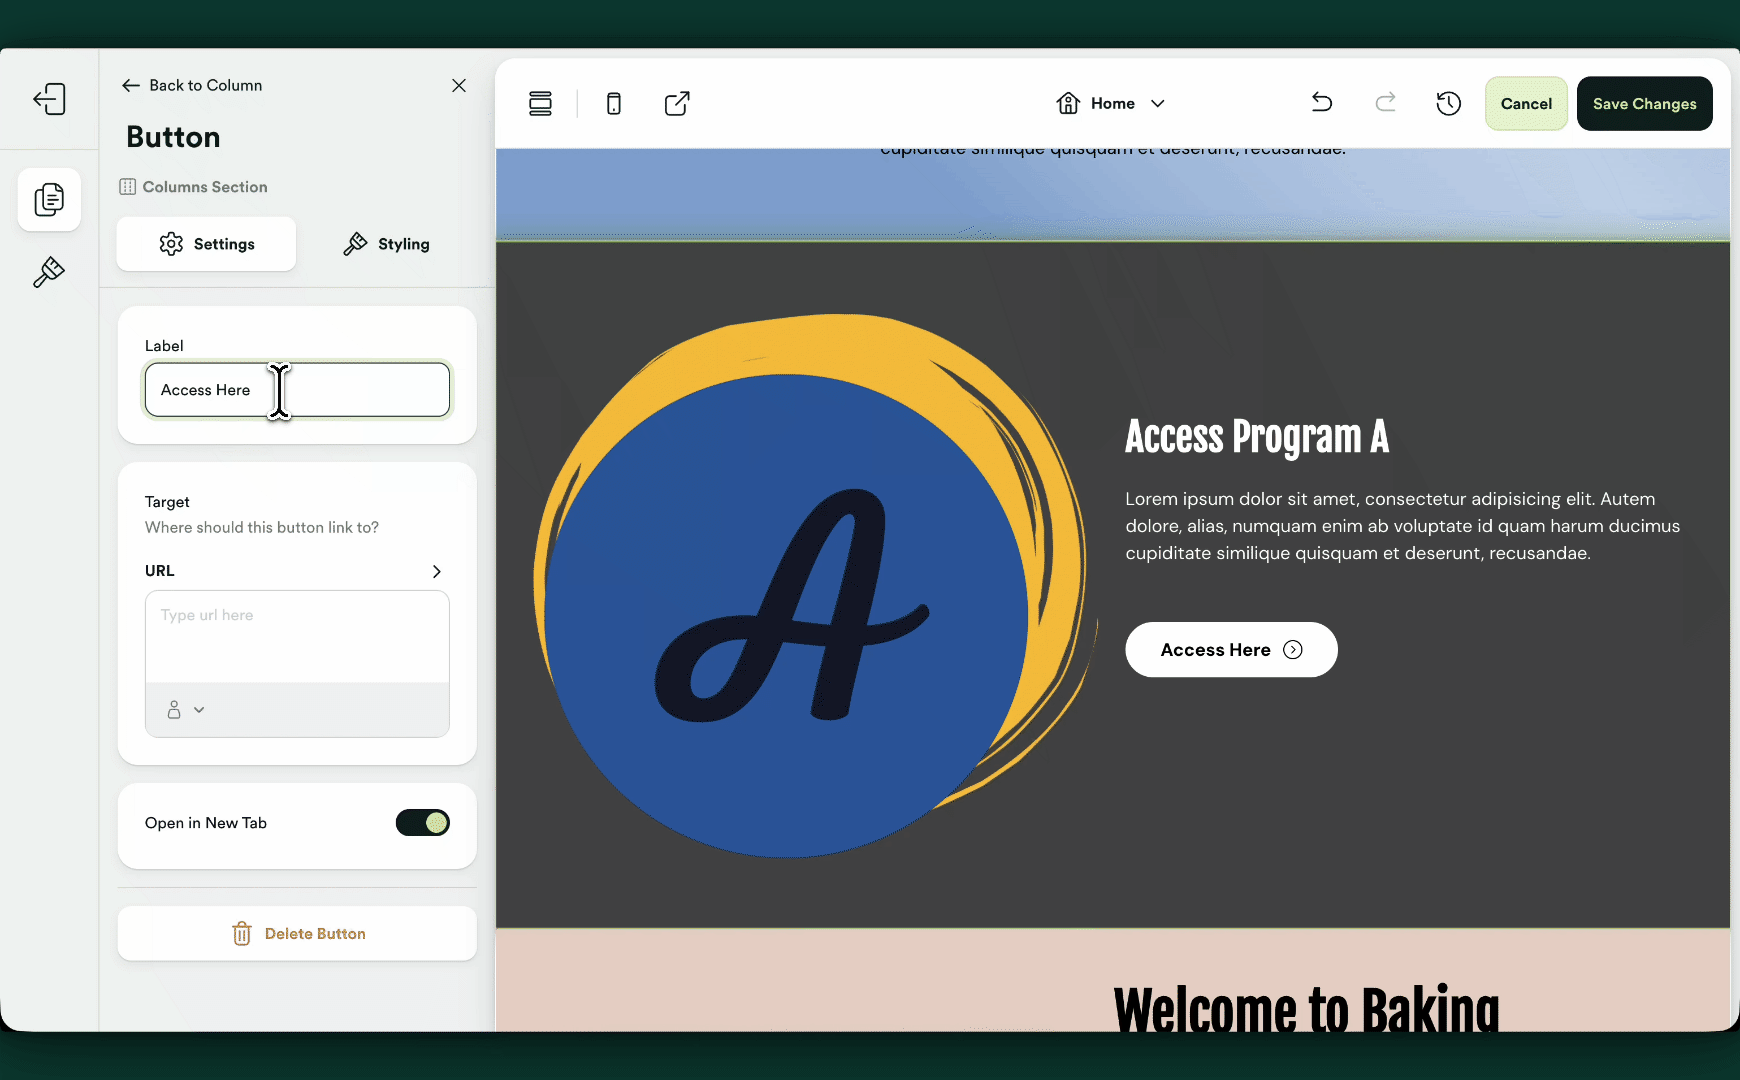
To add a button element to a Hub section that links to one of your Hubs:
- Add a new section and choose Columns under Custom Layouts, e.g., 2 columns (visual + call-to-action).
- Click Add Element > Button.
- Edit the button label.
- Choose Hubs > your Hub. This creates the Hub Magic Link.
- Click Save Changes.
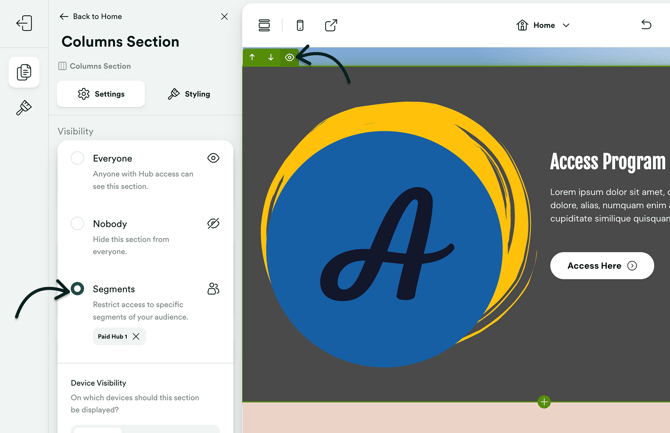
Step 4 – Use Segmentation to personalize the experience
Segmentation allows you to control which sections are visible to different members. This means setting up Contact Segments and setting the section visibility only to them.
Example:
- Members subscribed to Program A can see the Program A section
- Members enrolled in Program B can see the Program B section
- Members without access can be shown an offer or upgrade path instead
This helps create a cleaner experience by displaying only the content that is relevant to each member.
A common setup is to create a segment using:
Hubs > Is > <Hub Name>
Step 5 – Test your member experience
Before publishing, review the Hub using test accounts or member impersonation.
Verify that:
- Members can see the correct sections
- Restricted sections remain hidden from certain members
- Hub buttons point to the correct destinations
- Members can access the Hubs they are entitled to
NOTE: If a member doesn't yet have access to a linked Hub, the magic link sends them to that Hub's login page.
That's it! 🎉 If you need additional help with the setup, don't hesitate to reach out.